The arrival of a baby brings immense joy, but also a whirlwind of new responsibilities and, let’s be honest, a few anxieties. One task that often makes new parents a little nervous is cutting those tiny, surprisingly sharp baby nails. It feels like such a delicate operation, and the fear of accidentally nicking their precious skin is very real. But don’t worry, you’re not alone in feeling this way. With the right tools, a bit of knowledge, and a calm approach, you can master baby nail care safely and effectively.
Long nails on a baby aren’t just a cosmetic issue; they can pose a real risk. Babies often scratch themselves, their faces, and even their eyes, leading to irritation or minor injuries. Keeping their nails short and smooth is a crucial part of their hygiene and safety. This comprehensive guide will walk you through everything you need to know, from choosing the best tools to mastering the trimming technique, ensuring both you and your baby remain comfortable and safe.
Why Baby Nail Care Is So Important

Those miniature nails may seem harmless, but they grow surprisingly fast and can become quite sharp. Babies lack the fine motor control to prevent themselves from scratching. Imagine their flailing arms during a playtime burst or when they’re simply exploring their own face – those sharp edges can cause superficial scratches that, while usually not serious, can be uncomfortable and potentially lead to minor infections if not kept clean.
Beyond self-inflicted scratches, long nails can also snag on clothing, blankets, or even during cuddles, causing discomfort for your little one. Proper nail care is a fundamental part of a baby’s hygiene routine, preventing these common issues and keeping your baby’s skin healthy and intact. It’s a small task that makes a big difference in their daily comfort and safety.
When to Start Cutting Your Baby’s Nails

You might be surprised to learn that many babies are born with surprisingly long nails, which may even need trimming within the first few days or weeks of life. Newborns often have very soft, flexible nails that sometimes peel or tear easily. Initially, you might find that gently filing them down with a soft emery board is sufficient and less intimidating than cutting.
As your baby grows, their nails will become a bit firmer and grow more quickly. There isn’t a strict age to start cutting; it’s more about observing your baby’s nails. Once they start to feel sharp to the touch, or you notice your baby scratching themselves, it’s time to begin a regular trimming routine. For most babies, this happens within the first few weeks or months. Consistency is key, and you might find yourself trimming their fingernails weekly and toenails less frequently, perhaps every two to four weeks.
Essential Tools for Safe Baby Nail Trimming

Choosing the right tools is half the battle. Regular adult nail clippers are too large and cumbersome for tiny baby fingers and toes, increasing the risk of accidents. Invest in good quality, baby-specific nail care tools. Here are the most common options:
Baby Nail Clippers
These are smaller than adult clippers, often with curved or rounded blades designed to fit a baby’s small nails. Some have a safety guard to prevent cutting too deeply. Look for ones with an ergonomic grip that feels comfortable and secure in your hand.
Baby Nail Scissors
Many parents prefer baby nail scissors, especially for newborns, as they offer more control. They have blunt tips and short, curved blades specifically designed for baby nails. The controlled snipping motion can feel less abrupt than clippers.
Baby Nail Files or Emery Boards
These are invaluable, especially for very young babies or for smoothing any sharp edges left after clipping or cutting. Look for fine-grit emery boards or even glass nail files specifically designed for babies, which are gentle and durable. Filing is often the safest method for newborns and easily frightened toddlers.
Optional Magnifying Glass
Some baby nail clippers or kits come with a small magnifying glass. While not strictly essential, it can provide an extra layer of confidence, allowing you to see those tiny nails and the quick (the pink part under the nail bed) more clearly.
Choosing the Right Time and Environment
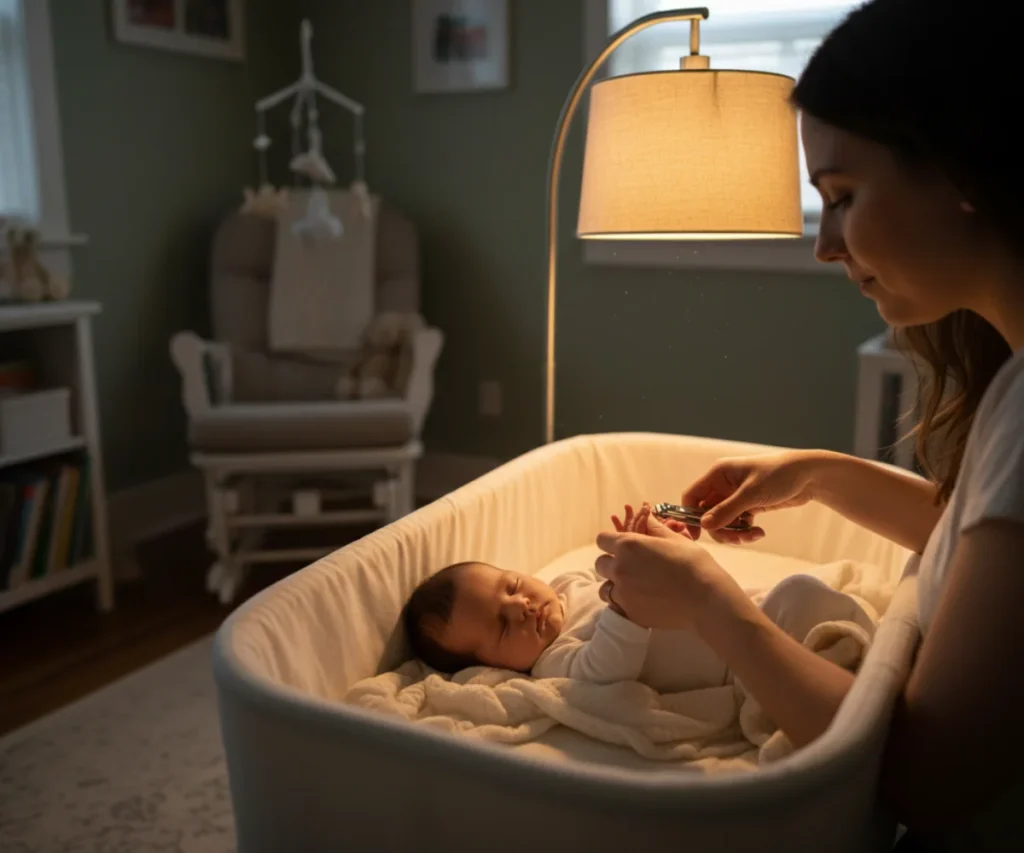
Timing is everything when it comes to baby nail care. A squirming, unhappy baby makes the task much harder and riskier. Find a moment when your baby is relaxed, calm, or even asleep. Here are a few strategies:
The Sleepy Strategy
This is often the most recommended method. When your baby is deeply asleep, their hands are usually relaxed and still, making it much easier to hold their fingers steady and trim their nails without resistance. Some parents even do it during a night feeding when the baby is drowsy and content.
The Distraction Method
If your baby is awake, try to distract them. This might involve nursing or bottle-feeding, engaging them with a favorite toy, singing a song, or having another adult entertain them. A busy baby is less likely to notice what you’re doing to their fingers.
Post-Bath Bliss
After a warm bath, your baby’s nails will be softer and easier to trim. They might also be more relaxed and sleepy, making it a perfect opportunity. The softened nails are less likely to split or tear.
Good Lighting is Key
Always ensure you have plenty of light, whether natural daylight or a well-lit room. This helps you clearly see your baby’s nails and, crucially, the quick underneath, minimizing the chance of accidental nicks.
Step-by-Step Guide How to Safely Trim Your Baby’s Fingernails
Now that you have your tools and your baby is calm, let’s go through the process step-by-step. Remember, slow and steady wins the race.
Prepare Your Tools and Yourself
Gather your chosen clippers or scissors, an emery board, and perhaps a clean cotton ball or tissue. Make sure your hands are clean and dry. Take a deep breath to calm any nerves you might have.
Position Your Baby Comfortably
Whether they’re asleep in your arms, in their car seat, or in a high chair with distractions, ensure your baby is secure and comfortable. If you have a partner or another adult available, they can gently hold the baby to keep them steady.
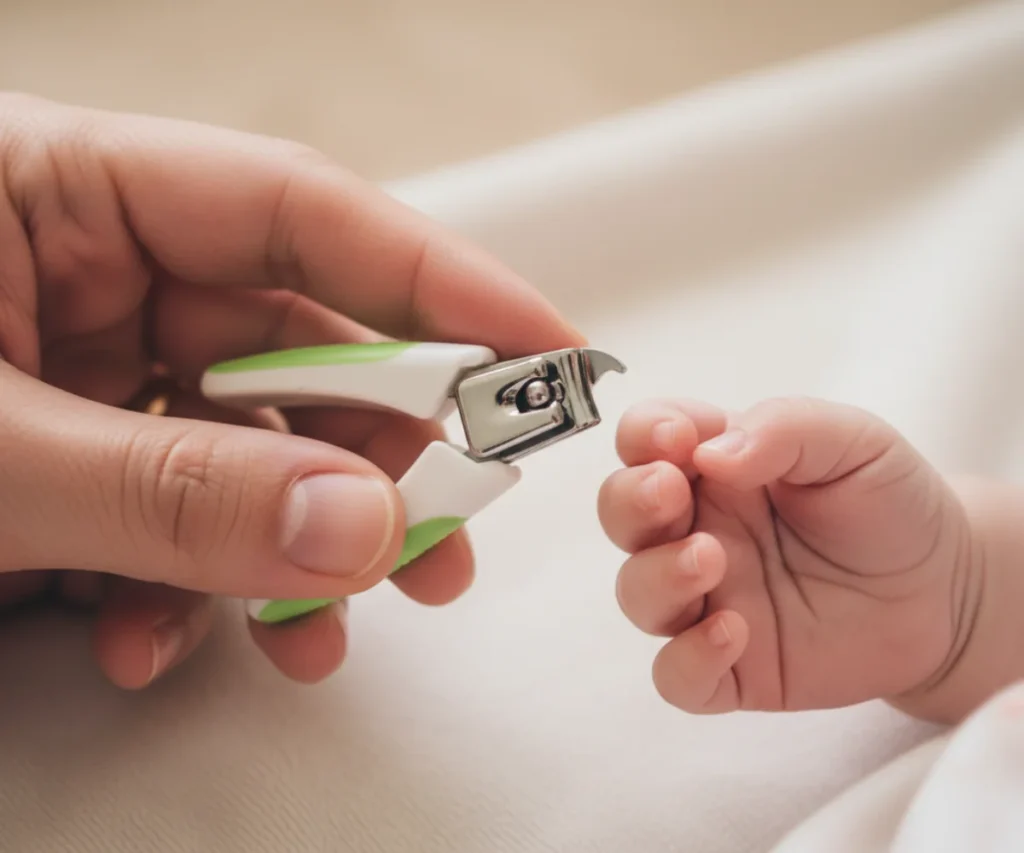
Isolate the Finger
Gently take one of your baby’s hands. With your thumb and forefinger, gently push down on the pad of the fingertip, separating it from the nail. This helps create a clear space and minimizes the risk of clipping the skin beneath the nail. You’ll be able to see the very tip of the nail more clearly.
Clip or Snip with Care
For fingernails, follow the natural curve of the nail. Use small, precise snips or clips, taking off only the white tip of the nail. Avoid cutting too close to the quick (the pink part under the nail), as this is where nerve endings and blood vessels are. If using clippers, make one clean cut. If using scissors, use several small snips to achieve the curve. Go one nail at a time, being patient and pausing if your baby starts to get fussy.
Smooth the Edges
After clipping or cutting, gently check for any sharp edges or snags. Use a baby-specific emery board to carefully file them smooth. This is especially important for very young babies, as even a tiny sharp edge can cause scratches. This step often makes the biggest difference in preventing self-scratches.
Special Considerations for Toenails

Baby toenails are generally thicker and grow slower than fingernails, so they don’t require trimming as frequently. However, they are just as important to maintain. The key difference in technique is how you cut them:
- Cut Straight Across: Unlike fingernails, which you trim along their curve, toenails should be cut straight across. This helps prevent ingrown toenails, a common and painful condition.
- Don’t Cut Too Short: Always leave a tiny bit of white at the end of the toenail.
- Check Less Frequently, But Regularly: You might only need to trim toenails once every two to four weeks, but check them regularly for length and sharp edges.
- Softer After Bath: Just like fingernails, toenails are softer and easier to manage after a bath.
Remember to use the same gentle approach and ensure good lighting for toenails as well.
What to Do if You Accidentally Nick Your Baby
It happens to almost every parent at some point, despite the utmost care. You might accidentally nick your baby’s skin. It’s incredibly upsetting, but the most important thing is to stay calm. Your baby will likely cry more from the surprise and your reaction than from actual pain. Here’s what to do:
Don’t Panic
Take a deep breath. A tiny cut on a baby’s fingertip or toe is usually superficial and not serious.
Apply Pressure
Gently press a clean, soft cloth or a cotton ball onto the cut. Maintain gentle pressure for a few minutes. The bleeding should stop fairly quickly.
Clean Gently
Once the bleeding has stopped, gently clean the area with mild soap and water or an antiseptic wipe designed for babies. Avoid harsh chemicals.
Avoid Adhesives
Resist the urge to put a band-aid on your baby’s tiny finger or toe. Babies tend to put their fingers in their mouths, and a band-aid can become a choking hazard. Also, removing adhesive from delicate baby skin can be irritating. The best approach is to keep the area clean and let it heal naturally, which it usually does very quickly.
If the bleeding doesn’t stop, or you notice any signs of infection (redness, swelling, pus), contact your pediatrician.
Common Mistakes to Avoid
Learning from common pitfalls can help you avoid unnecessary stress and ensure your baby’s nails are always well-maintained.
Biting Nails
While it might seem convenient, biting your baby’s nails is generally not recommended. Your mouth carries bacteria that could cause infection, and it’s hard to get a clean, even cut with your teeth, potentially leaving sharp edges.
Rushing the Process
Attempting to trim nails when you’re stressed, in a hurry, or your baby is fussy significantly increases the risk of accidents. Pick a time when you can dedicate your full attention and remain calm.
Using Adult Tools
Adult nail clippers or scissors are too large and sharp for a baby’s delicate nails and skin. Always use baby-specific tools designed for safety.
Neglecting Toenails
While they grow slower, baby toenails still need attention. Forgetting about them can lead to discomfort, snagging, or even ingrown toenails.
Ignoring Ingrown Nails
If you notice redness, swelling, or tenderness around a toenail, especially if it seems to be growing into the skin, consult your pediatrician. Early intervention can prevent further discomfort.
Making Nail Care a Positive Experience
As your baby grows into a toddler, nail care might become a bit more challenging as they gain independence and opinions. Turning it into a positive experience can make a big difference in the long run.
Consistency is Key
Regular nail care prevents nails from getting too long and making the task overwhelming. It also helps your child get used to the routine.
Involve Older Children
For toddlers, let them choose which finger or toe to do next, or let them hold the emery board (under supervision, of course) as a ‘helper.’ Make it a ‘grown-up’ task they can participate in.
Make it a Game
Sing a song, tell a story, or play ‘peek-a-boo’ during the process. Distraction is still a powerful tool, but making it fun can reduce resistance.
Praise and Reward
After successfully trimming their nails, offer lots of praise and a small reward, like a sticker or a few minutes of extra playtime. Positive reinforcement works wonders.
Remember, patience and a gentle approach are your best allies. With practice, you’ll become more confident, and your baby will become more accustomed to the routine, making nail care a quick and easy part of your family’s hygiene regimen.