
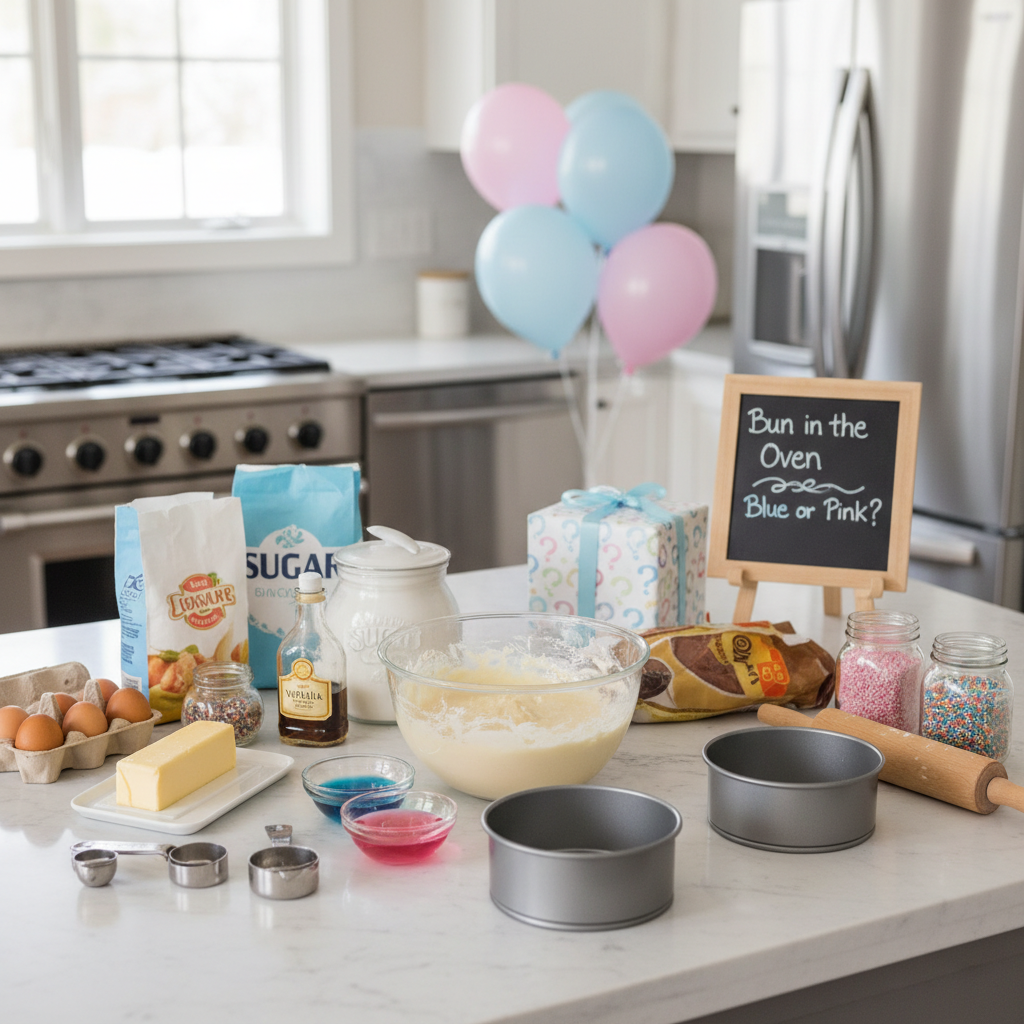
There’s a special kind of magic in discovering whether you’re welcoming a little boy or a little girl. And what better way to share that joy than with a homemade gender reveal cake? It’s not just a dessert; it’s a centerpiece, a conversation starter, and a tangible expression of love and anticipation. Hosting a gender reveal at home allows for an intimate, personal celebration, and a homemade cake perfectly complements that cozy atmosphere.
Forget the stress of elaborate party planning. This guide is all about empowering you to create a beautiful, delicious, and memorable gender reveal cake right in your own kitchen. We’ll explore various ideas, offer step-by-step advice, and share tips to make your reveal moment truly special, without breaking the bank or your sanity.
Why Choose a Homemade Gender Reveal Cake

Opting for a homemade gender reveal cake brings a unique charm and a host of benefits that a store-bought option simply can’t match. It transforms the reveal into a deeply personal and heartfelt experience, not just for you but for everyone involved.
- A Personal Touch Making the cake yourself infuses it with love and anticipation. Each stir of the batter, each swirl of frosting, is a moment to connect with your baby on the way.
- Cost-Effective Celebration Professional gender reveal cakes can be pricey. Baking at home significantly cuts down on costs, allowing you to allocate your budget to other party essentials or save it for baby items.
- Dietary Customization Do you or your guests have allergies or dietary restrictions? Baking at home gives you complete control over ingredients, ensuring everyone can safely enjoy a slice of the special moment.
- A Memorable Activity For many parents, the process of creating the cake becomes a cherished memory in itself, a sweet prelude to the big reveal.
Classic Reveal Cakes – Simple and Sweet Surprises
Sometimes, the simplest ideas are the most impactful. These classic gender reveal cake designs focus on a straightforward, yet utterly delightful, surprise inside.
Solid Color Frosting Reveal
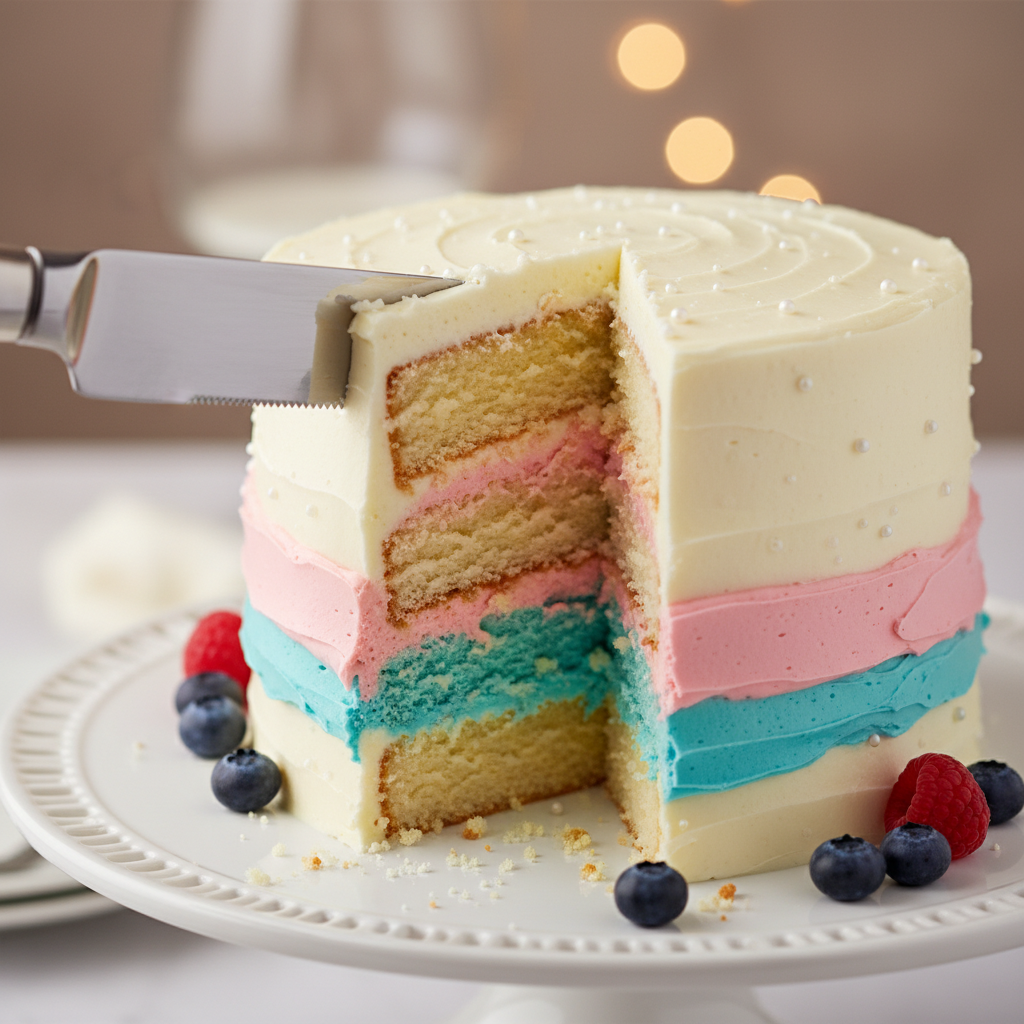
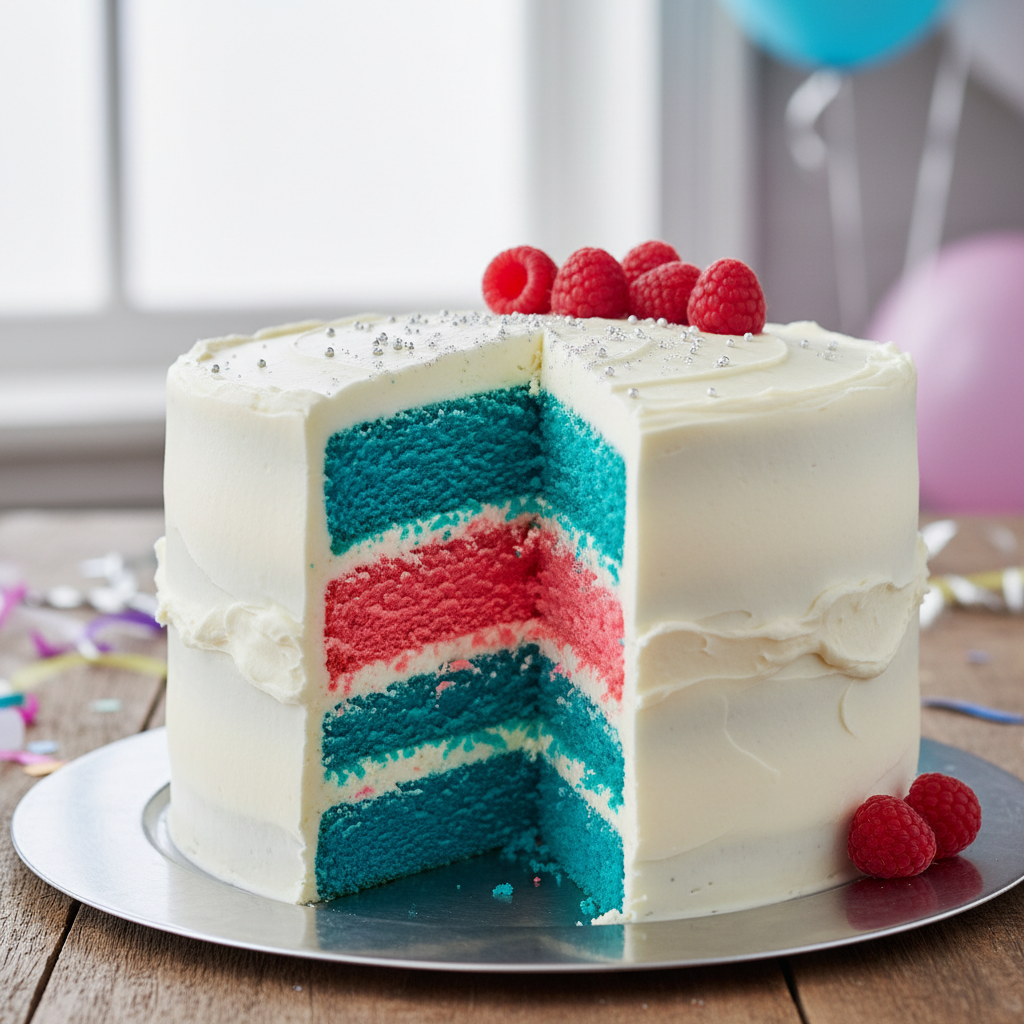
This is perhaps the most iconic and easiest homemade gender reveal cake. The exterior can be decorated neutrally, with white, cream, or pastel shades, completely concealing the secret. When sliced, a vibrant blue or pink cake emerges, creating a wonderful gasp-worthy moment.
How to do it
- Bake your favorite cake batter, dividing it into two or three bowls.
- Add a few drops of blue or pink food coloring to one portion of the batter until you achieve your desired shade.
- Bake the colored batter in separate cake pans. You can also bake neutral layers and one colored layer for a subtle hint.
- Once cooled, stack the colored layers with a neutral frosting between them.
- Frost the entire cake with a thick, opaque neutral-colored buttercream, ensuring no hint of the inner color peeks through.
Ombre Layer Reveal
For a more sophisticated and visually stunning reveal, consider an ombre layered cake. This design features multiple cake layers, transitioning from a lighter shade of blue or pink to a deeper, more saturated hue. It adds an extra layer of anticipation as guests see the gradient unfold.
How to do it
- Divide your cake batter into 3-4 bowls.
- Add varying amounts of blue or pink food coloring to each bowl, creating a light, medium, and dark shade.
- Bake each colored batter in separate cake pans.
- Stack the layers from darkest to lightest (or vice-versa) with neutral frosting in between.
- Frost the exterior neutrally, or with a subtle white-to-light-color ombre effect if you dare!
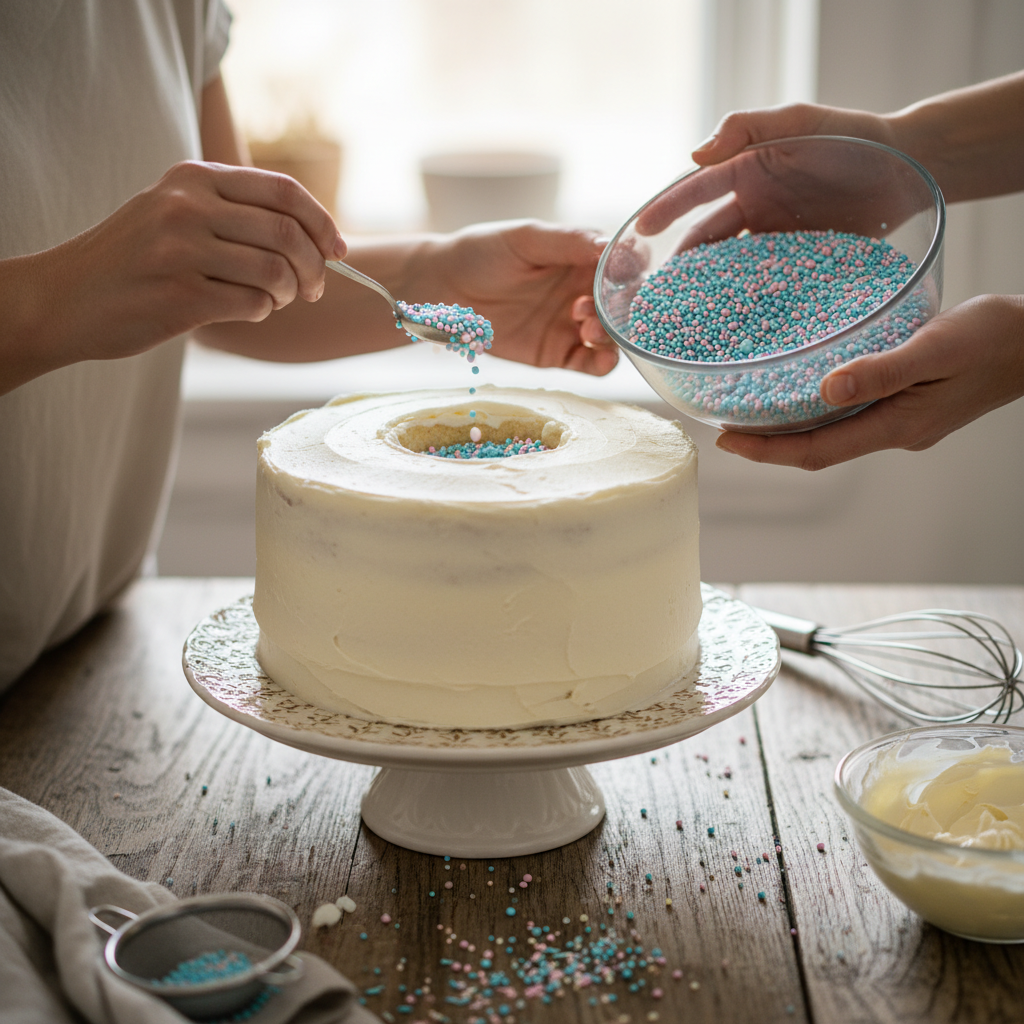
Confetti or Sprinkles Burst

Imagine the delight as the cake is cut, and a shower of colorful sprinkles or edible confetti spills out! This method is incredibly fun and adds an element of surprise and whimsy to your reveal. It’s particularly exciting for photos and videos.
How to do it
- Bake two round cake layers.
- Once cooled, carefully cut a circular well in the center of one of the cake layers, ensuring you don’t cut all the way through the bottom.
- Fill this well with blue or pink sprinkles, edible glitter, or small candies.
- Place the second cake layer on top, sealing the “surprise” inside.
- Frost the entire cake with your chosen neutral exterior.
Creative Fillings and Hidden Surprises
Beyond colored cake batter, you can get incredibly creative with what you hide inside your gender reveal cake. These ideas add an extra layer of excitement and a unique twist to the traditional reveal.
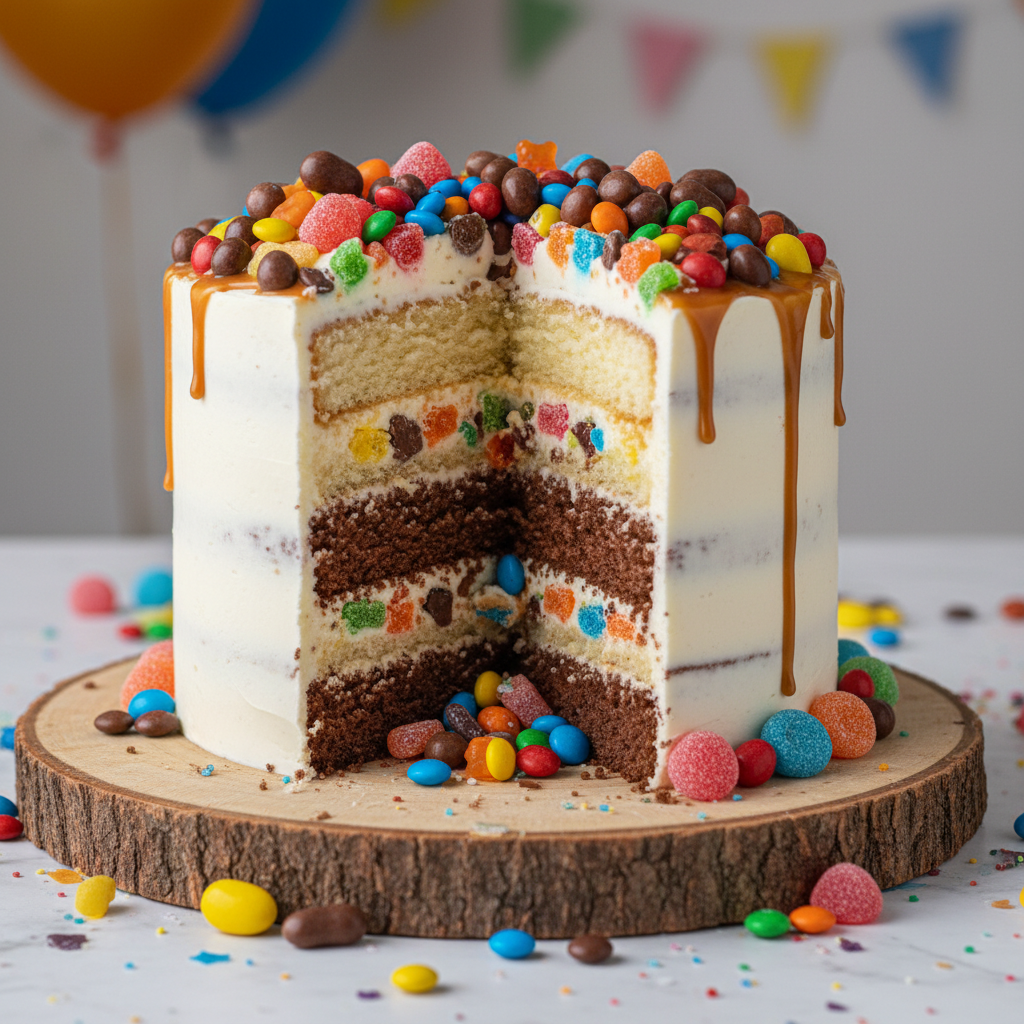
Candy-Filled Center
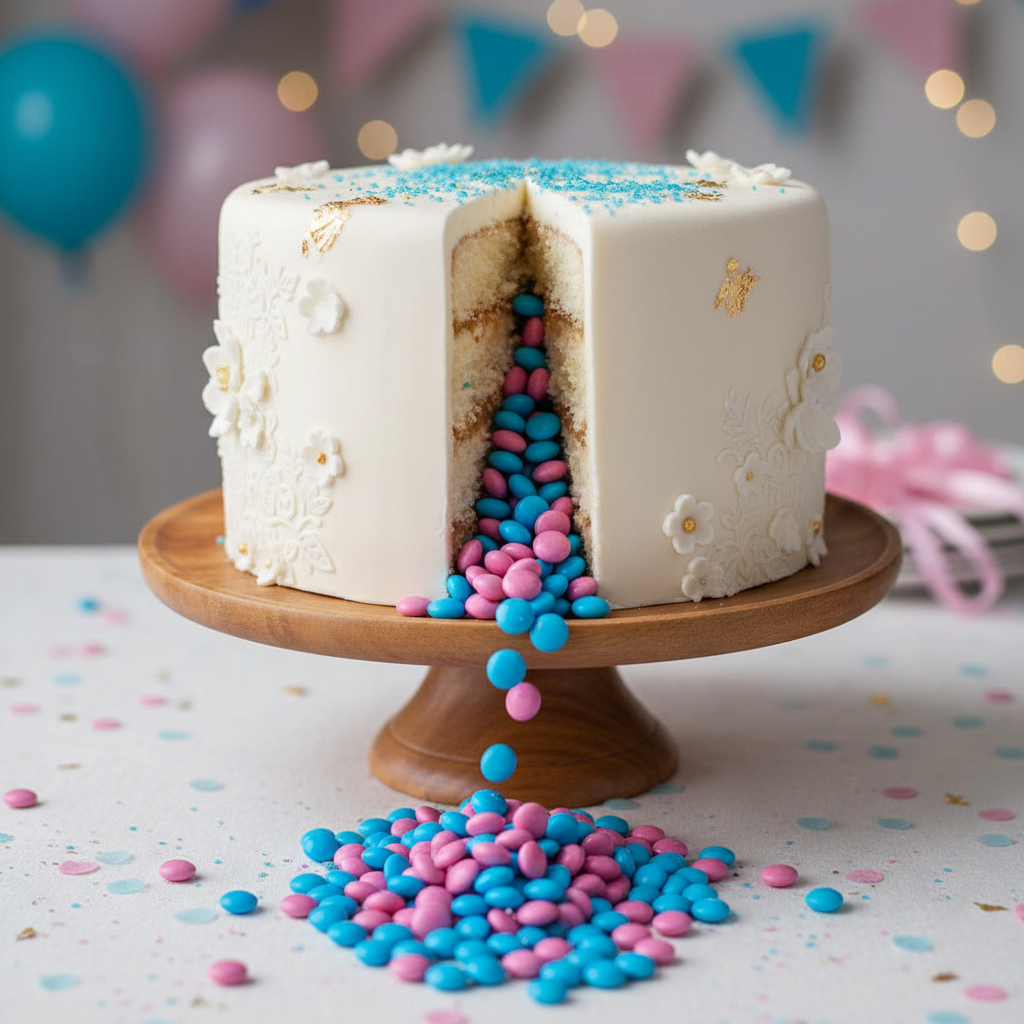
This is a surefire way to get a collective “ooh” and “ahh” from your guests. When the cake is sliced, a delightful avalanche of blue or pink candies tumbles out. Think M&Ms, Skittles, or even small gumballs in your chosen color.
How to do it
- Bake two or three cake layers.
- Once cooled, use a round cookie cutter or a small knife to carefully cut a circular cavity out of the center of one or more layers, leaving a border.
- Stack these layers with frosting, leaving the central cavity open.
- Fill the cavity with your chosen blue or pink candies.
- Place a final cake layer on top to seal the cavity, then frost the entire cake.
Custard or Cream Filling Surprise
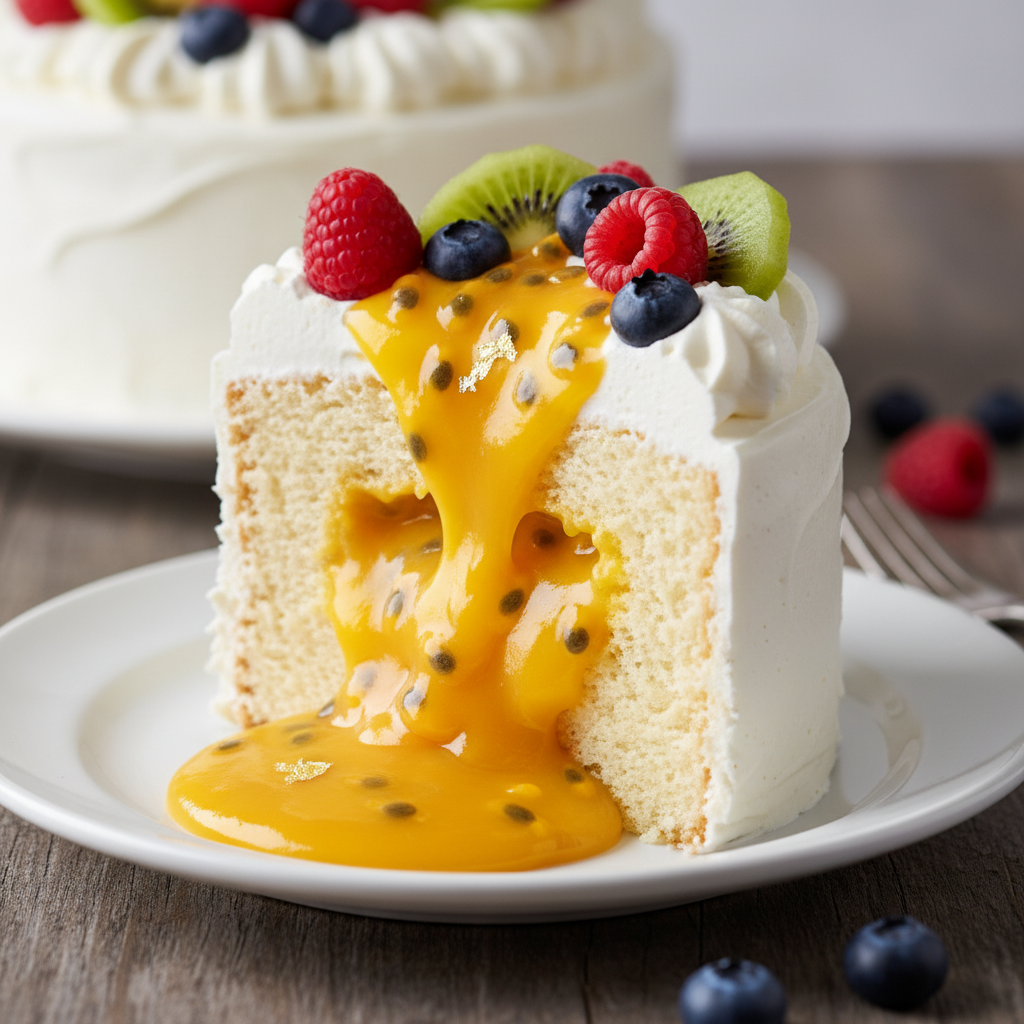
For a softer, more elegant surprise, a colored custard or cream filling can be absolutely delicious. Imagine a delicate vanilla cake with a smooth, subtly colored raspberry or blueberry cream inside. This works beautifully with lighter cake bases.
How to do it
- Prepare your favorite custard or cream filling recipe.
- Once cooled, gently fold in blue or pink food coloring until the desired shade is reached.
- Bake two or three cake layers.
- Create a dam of frosting around the edge of each layer before filling the center with your colored custard.
- Stack the layers, ensuring the custard is contained, then frost the exterior.
Decorating Your Reveal Cake – Tips and Tricks
The exterior of your gender reveal cake is just as important as the interior. It sets the tone, builds anticipation, and provides a beautiful canvas for your big moment. Here are some ideas for making your cake look stunning without giving away the secret.
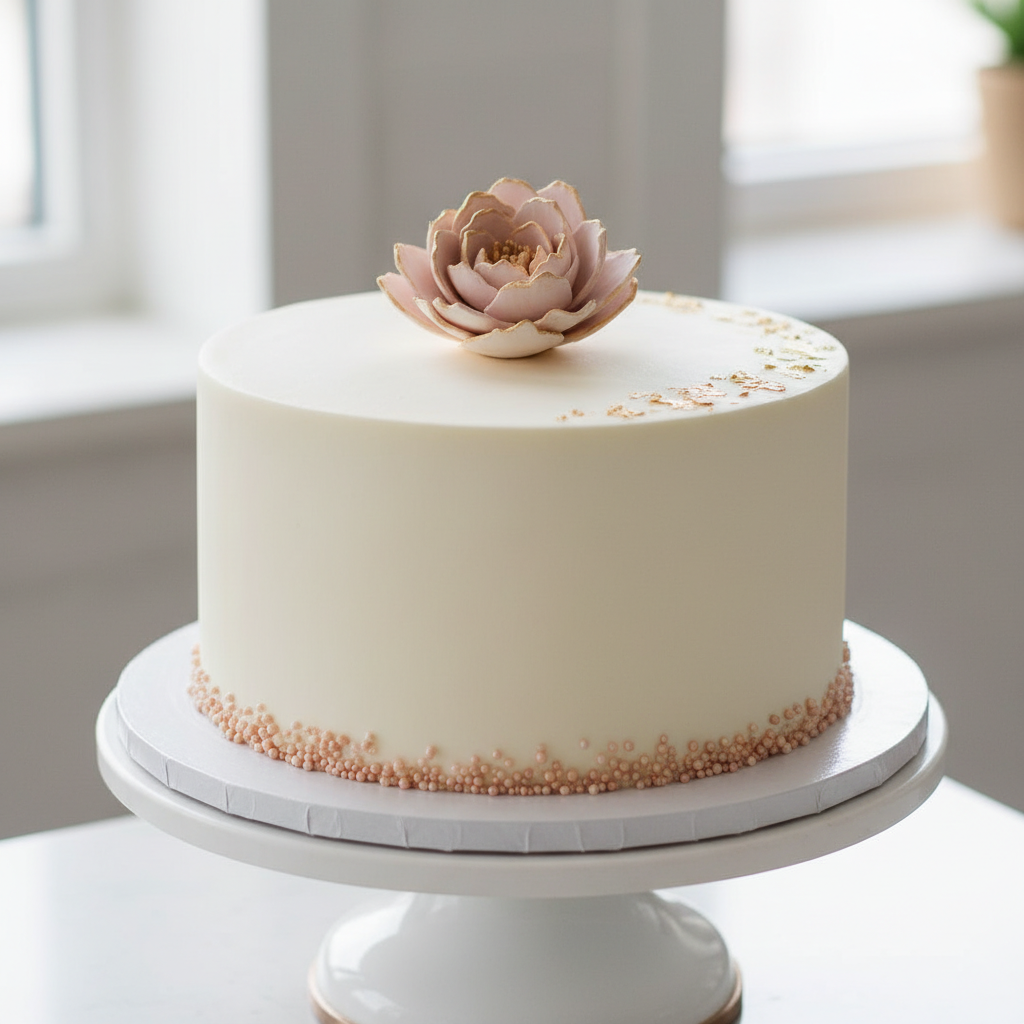
Outside Decor Ideas – Neutral and Sweet
Keep the outside design gender-neutral and celebratory. This could include:
- White and Gold Accents Elegant and timeless.
- Pastel Hues Think mint green, pale yellow, or lavender, which are lovely and ambiguous.
- Baby-Themed Decorations Small fondant baby feet, rattles, or pacifiers in neutral colors.
- “Boy or Girl?” Question Marks Subtle question mark designs or patterns.
- Woodland or Starry Night Themes Beautiful and versatile.
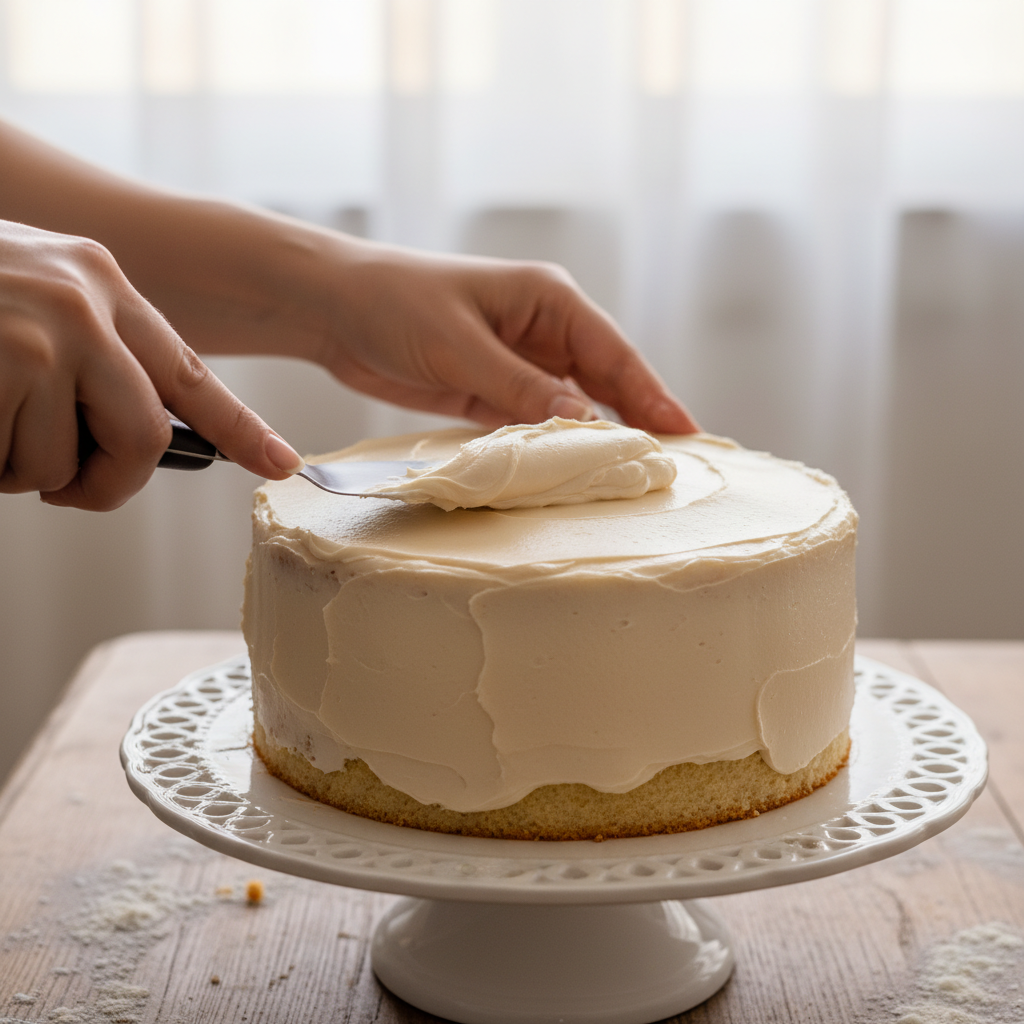
Frosting Techniques for a Smooth Finish
Achieving a smooth, professional-looking frosting can seem daunting, but it’s achievable with a few simple techniques:
- Crumb Coat Apply a thin layer of frosting to seal in crumbs, then chill before applying your final coat.
- Warm Spatula For a super smooth finish, gently warm your offset spatula in hot water, wipe it dry, and use it to smooth the final frosting layer.
- Piping Bags Use a piping bag for an even application of frosting before smoothing.
Step-by-Step Guide to Baking Your Reveal Cake
Let’s walk through the general process of baking a gender reveal cake from start to finish. This adaptable guide can be used for most of the ideas mentioned above.
Choosing Your Cake Base
Start with a reliable cake recipe. Vanilla, white cake, or even a light lemon cake work well as they take food coloring easily without altering the flavor too much. Box mixes are perfectly acceptable for convenience!
Adding the Color
Once your batter is mixed, separate a portion (or all of it, depending on your chosen design) and carefully add gel food coloring. Gel colors provide a more vibrant hue without thinning the batter. Mix until the color is evenly distributed.
Baking and Cooling
Pour your colored batter into prepared cake pans. Bake according to your recipe’s instructions. Crucially, allow your cakes to cool completely on a wire rack before attempting to frost or assemble. Warm cakes will melt frosting!
Assembling and Hiding the Surprise
This is where the magic happens! Whether you’re layering colored cakes, creating a cavity for candy, or piping in a colored cream, ensure your reveal element is securely hidden. Use a sturdy frosting dam if working with liquid fillings.
Final Frosting and Decorating
Apply a crumb coat, chill, and then apply your final layer of neutral frosting. Now comes the fun part-decorating the exterior! Get creative with your chosen theme, keeping the gender a secret until the big cut.
Planning Your Reveal Party – Beyond the Cake

While the cake is the star, the overall party atmosphere enhances the excitement. Keep it simple and focused on connection and joy.
- Guest List and Invites Keep it intimate for home parties. Digital invites are easy and eco-friendly.
- Other Decorations Complement your cake with neutral balloons, banners, or flowers. “Twinkle Twinkle Little Star” or “What Will Baby Be?” themes are lovely.
- Capturing the Moment Designate someone to take photos or videos of the cake cutting. This is a moment you’ll want to relive!
Troubleshooting Common Gender Reveal Cake Challenges

Even seasoned bakers encounter hiccups. Here are solutions to common issues:
- Color Bleed To prevent colored cake layers from bleeding into neutral frosting, ensure cakes are completely cooled. A thin “dam” of frosting around the edge of a colored layer can also help.
- Cake Cracks If your cake cracks during baking or cooling, don’t panic! Frosting is a wonderful camouflage. You can also use a small amount of extra cake batter or frosting to “glue” pieces back together before frosting.
- Keeping the Secret The trickiest part! If you know the gender, be extra careful with your colored ingredients. If a trusted friend or family member knows, they can help with the colored elements while you do the rest.
A Sweet Beginning to Your New Chapter
Creating a homemade gender reveal cake is more than just baking; it’s an act of love, a cherished memory in the making. As you gather with loved ones, remember that the true joy lies not just in the color of the cake, but in the anticipation, the shared excitement, and the beginning of a beautiful new chapter. Whether it’s blue or pink, your baby is already so loved. Enjoy every sweet moment of this incredible journey!